
Polyethylene Wax in Rubber Processing works as a low-molecular lubricant and flow improver that helps compounds mix, disperse fillers, and release from dies and molds more cleanly. The right grade (melt point, polarity, particle form) and a controlled 0.3–3.0 phr dosage can lower viscosity, cut sticking, and improve surface finish without triggering bloom.
Highlights & Key Sections
Why this matters (and who this guide is for)
If you compound, extrude, calender, or mold rubber, PE wax can be a small-addition “lever” that improves day-to-day processing stability.
You’ll get:
- A practical way to choose the right grade (not just “use oxidized vs non-oxidized”)
- Dosage starting points you can validate fast
- Mixing, troubleshooting, and buying specs that reduce trial-and-error
Polyethylene Wax in Rubber Processing: What It Does in a Compound
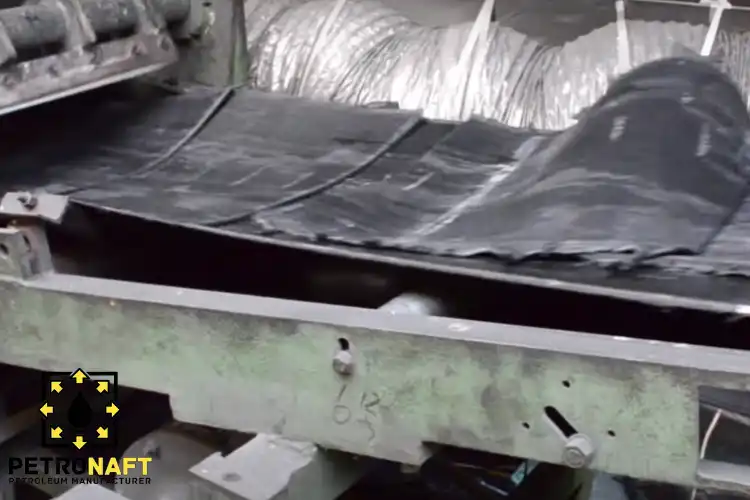
Think of PE wax as a controlled friction manager. At processing temperature it softens and migrates where friction is highest—between polymer chains, fillers, and metal surfaces—so the compound flows with less shear stress.
The four most useful mechanisms (what you’ll actually notice)
- Internal lubrication: lowers compound viscosity and improves flow through tight geometry.
- External lubrication / release: reduces sticking on mills, calenders, dies, and mold surfaces.
- Filler wet-out + dispersion support: helps carbon black/silica distribute more uniformly at a given mixing energy.
- Surface “conditioning”: can improve surface finish and reduce die lines—if dosage stays below bloom threshold.
What to measure so results don’t stay “subjective”
| What PE wax changes | What you measure on the floor | What “good” looks like |
|---|---|---|
| Viscosity / flow | Mooney or process amperage/torque | Lower or steadier at same throughput |
| Release / anti-stick | Mill handling, die build-up, mold release | Cleaner release, less tear, less build-up |
| Dispersion | Dispersion rating, surface specks, variability | Fewer specks, tighter batch-to-batch spread |
| Surface finish | Extrudate appearance, die lines, edge quality | Smoother surface, fewer lines |
Benefits you can realistically expect (when the grade is right)
Most compounds see one or more of these improvements without sacrificing key physicals—provided you validate cure and bloom risk.
Common wins:
- Easier mixing: faster wet-out, less “dry banding,” smoother sheet-off
- Higher throughput: more stable extrusion at the same head pressure
- Cleaner processing: less sticking and less die/mold fouling
- More consistent quality: fewer surface defects tied to dispersion swings
A practical example (how to prove it in a week):
- Run two batches: baseline vs +PE wax at your starting dosage.
- Track mixer peak torque, time to incorporation, and mill handling notes.
- Extrude at identical settings and compare head pressure, surface lines, and die build-up after X meters.
Grades of PE wax and how to choose the best one
“PE wax” is a family. Choosing by name alone is why many trials disappoint.
The decision factors that matter most
- Melt/drop point: must activate in your processing window, not after it.
- Polarity (oxidation level): affects compatibility and bloom tendency.
- Molecular weight / viscosity: influences lubrication strength and migration.
- Particle form: powder vs prill vs micronized affects incorporation speed and dust.
- Additive package cleanliness: impurities can show up as specks or odor.
Quick grade selection table
| Grade family (simplified) | Best at | Best fit applications | Watch-outs |
|---|---|---|---|
| Non-oxidized PE wax | Strong lubrication, flow | General processing aid, extrusion flow | Higher bloom risk if overdosed; can reduce tack |
| Oxidized PE wax | Better compatibility, dispersion support | Filled compounds, surface/appearance-sensitive parts | Can behave “stronger” than expected—start lower |
| Micronized PE wax | Fast incorporation, uniform distribution | Short mixing cycles, tight dispersion targets | Dust control needed unless dust-free grade |
| Masterbatch / predispersed | Dosing accuracy, low dust | High-volume plants, automation | Cost per active wax can be higher; check carrier compatibility |
Mini tutorial: pick a grade in 5 steps
- Write your pain point in one line: sticking, die lines, poor dispersion, unstable extrusion, etc.
- Map pain to mechanism: sticking → external lubrication; die lines → flow + release; dispersion → compatibility + wet-out.
- Match melt point to your process: choose a wax that activates during mixing/extrusion, not only after cure.
- Choose polarity by rubber/filler: more demanding dispersion or more polar systems usually benefit from higher compatibility.
- Select the delivery form: powders for fast incorporation; masterbatch for accuracy/dust control.
Dosage guide (phr) you can start with safely
PHR means “parts per hundred rubber” (per 100 parts of base elastomer).
Start low and move in small steps. PE wax is powerful enough that overshooting can cause bloom, bonding issues, or surface haze.
Practical starting ranges (validate in your compound)
| Goal | Typical starting point | Typical working range | Notes |
|---|---|---|---|
| General flow improvement | 0.3 phr | 0.3–1.0 phr | Often enough for torque/handling gains |
| Extrusion throughput + surface | 0.5 phr | 0.5–1.5 phr | Watch die swell and surface gloss changes |
| Mold release / de-molding | 0.8 phr | 0.8–2.0 phr | Confirm paint/adhesion needs afterward |
| High-fill dispersion support | 0.5 phr | 0.5–1.5 phr | Check dispersion + cure consistency |
| Tack reduction / blocking control | 0.3 phr | 0.3–1.0 phr | Too much can hurt green tack |
Mini tutorial: a fast DOE that locks dosage (no long R&D)
- Choose 3 dosages: low / mid / high (example: 0.3 / 0.8 / 1.3 phr).
- Keep everything else constant (polymer, oil, filler, curatives, mix cycle).
- Measure:
- Mixing: peak torque, dump temperature, incorporation time
- Processing: extrusion head pressure, surface score, die build-up
- Cure: rheometer curve consistency, scorch safety
- Appearance: bloom check after 24–72 hours at room temperature
- Pick the lowest dosage that delivers the target gains with no new risks.
Where (and when) to add PE wax in the mix
PE wax placement matters as much as dosage.
Internal mixer (common best practice)
- Add polymers first and begin mastication.
- Add fillers and oils in your standard sequence to reach good wet-out.
- Add PE wax late (final stage) so it coats and lubricates rather than interfering with initial filler incorporation.
- Dump at a controlled temperature to avoid over-activation and migration.
Two-roll mill
- Add after the compound bands well and fillers are largely incorporated.
- Keep nip and friction ratio stable; let the wax distribute before final sheet-off.
What “late addition” prevents
- Wax coating fillers too early (slower wet-out)
- Unwanted slip during incorporation (dispersion suffers)
- More migration than needed (bloom risk rises)
Troubleshooting: symptoms, likely causes, fixes
| Symptom | Likely cause | Fix you can try first |
|---|---|---|
| Bloom / surface film | Dosage too high or wax too incompatible | Reduce phr; switch to more compatible grade; use a masterbatch for tighter dosing |
| Loss of green tack | Too much external lubrication | Drop dosage; change to a less “slippery” grade; adjust tackifier system if used |
| Poor paint/adhesion | Surface migration of wax | Reduce phr; select grade with lower migration; add adhesion test to approval plan |
| No processing benefit | Melt point too high or poor dispersion | Choose lower-activation grade; use micronized or masterbatch; adjust addition timing |
| Die build-up persists | Root cause is filler/resin imbalance | Confirm filler dispersion; review oil level and filler surface treatment; then re-test wax |
| Cure variability | Interaction with cure system or mixing temperature drift | Tighten dump temperature window; verify cure curve; trial a lower dosage |
A simple bloom check that saves headaches:
- Cure a plaque.
- Store 24–72 hours at room temperature and under mild warmth.
- Wipe with a clean dark cloth and inspect under angled light for haze/film.
Buying checklist: how professionals specify PE wax (so performance is repeatable)
When you buy “PE wax” without specs, you buy variability.
Ask for these technical parameters
| Parameter | Why it matters in rubber processing | What to do with it |
|---|---|---|
| Melt/drop point | Defines activation window | Match to your mix/extrusion temperatures |
| Viscosity (at a defined temp) | Predicts lubrication strength | Higher viscosity often means stronger film behavior |
| Acid value / polarity indicator | Predicts compatibility and migration | Use higher compatibility when bloom risk is critical |
| Penetration/hardness | Affects handling and dispersion | Too soft can smear; too hard can disperse slowly |
| Particle size (if powder) | Controls incorporation speed and dust | Smaller = faster dispersion, more dust unless controlled |
| Volatiles/odor control | Matters for indoor parts & seals | Add to incoming QC if sensitive |
Procurement tips that prevent plant surprises
- Require lot-to-lot consistency with a certificate of analysis.
- Confirm packaging and dust control fit your feeding system.
- If you sell regulated end products, request the supplier’s regional compliance declarations relevant to your markets.
Trends that make PE wax selection more important right now
1) High-filler, low-loss compounds are less forgiving
Modern compounds—especially those designed for lower rolling resistance and tighter dispersion targets—often run closer to processing limits. That makes small changes in lubrication and wet-out show up immediately as variability.
What to do:
- Prioritize dispersion metrics and head pressure stability, not just “it feels smoother.”
2) Cleaner, more automated plants push dust-free dosing
As compounding lines automate, powders that create dust become harder to manage. Predispersed forms and dust-controlled grades reduce housekeeping time and improve dosing accuracy.
What to do:
- If your plant is moving toward automated feeding, evaluate masterbatch delivery early.
Conclusion
Used correctly, Polyethylene Wax in Rubber Processing is one of the fastest ways to improve flow, release, and consistency with a small phr change. Choose the grade by activation window and compatibility, add it late in the mix, and validate with a simple three-point dosage trial. Your best result is the lowest dosage that hits throughput and surface targets with zero bloom or bonding penalties.
Executive Summary Checklist (print this)
- Define the goal: flow, release, dispersion, surface, or tack control
- Match wax activation to your processing temperatures
- Choose compatibility level to manage bloom and adhesion risk
- Start at 0.3–0.8 phr; test three dosages before “scaling up”
- Add late in mixing to avoid slowing filler incorporation
- Validate: torque/amperage, head pressure, surface score, cure curve, bloom check
- Lock procurement specs (melt point, viscosity, polarity, particle size, lot consistency)
FAQs
1) Will PE wax change cure speed or scorch time?
It can, indirectly, if it changes mixing temperature, dispersion, or migration behavior. Always confirm with a cure curve test and keep dump temperatures tightly controlled when you introduce or change wax grade.
2) What’s the difference between oxidized and non-oxidized PE wax in rubber?
Oxidized grades generally show higher compatibility and better dispersion support, while non-oxidized grades often deliver stronger slip and flow. Your rubber type, filler level, and bloom sensitivity decide which behaves “better.”
3) Why do I see bloom even at low dosage?
Bloom can come from incompatibility, low solubility at ambient temperature, or a wax that migrates too aggressively. Reduce phr, select a more compatible grade, and verify that your compound isn’t already near its migration limit from other ingredients.
4) Should I add PE wax as powder or masterbatch?
Powders incorporate fast but can create dust and dosing variation. Masterbatch dosing is cleaner and more repeatable, especially for automated plants—just confirm the carrier is compatible and doesn’t shift your formulation balance.
5) Can PE wax replace other processing aids?
Sometimes it can reduce the need for other lubricants or release agents, but it rarely replaces all of them in one step. Optimize as a system: test one change at a time and keep your performance targets and bonding requirements in view.
Sources
- Practical technical overview of how polyethylene-based wax processing aids improve release, viscosity, and extrusion behavior in rubber compounds — A-C® Polyethylene in Rubber Processing brochure (PDF)
- Industry reference handbook covering rubber compounding fundamentals, processing behavior, and formulation considerations — The Vanderbilt Rubber Handbook (PDF)
- Comprehensive reference text on rubber compounding chemistry, ingredient functions, and practical formulation strategy — Rubber Compounding: Chemistry and Applications (CRC Press / Taylor & Francis)
- 2026 peer-reviewed review summarizing recent compounding developments and emerging directions such as bio-based additives and AI/ML formulation optimization — Transformative developments in natural rubber compounding (ScienceDirect)